Can you burn ice? In this burning ice experiment, teachers can demonstrate for middle schoolers, that in some cases, you can set ice on fire. This is a favorite of the middle school STEM activities that my middle school students have loved to repeat. The inspiration behind this project was a question my middle school-aged daughter asked. She wanted to know if ice could ever burn. That’s how this ice on fire experiment was born! It’s one of the most creative STEM activities for kids that we’ve tried to date.

Find out how you can impress kids using our tutorial for a burning ice cube below!
Make sure your kids won’t try this experiment alone before showing it to them. If you think there is a chance they will try it alone, it’s better to not do it.
Table of Contents
Can You Burn Ice? The Science Behind the Cool Science Demo!
In this burning ice experiment, the ice appears to burn because a solution of alcohol is poured over the ice before it is set on fire. It is the alcohol that is burning, not the water itself.
However, the heat of the flame evaporates the water, keeping the flame going even as the ice block melts.
Eventually, the water will melt faster than the alcohol burns, but as long as the alcohol is present, the fire will keep going.
This is a good time to discuss why kids shouldn’t play with fire, as alcohol will continue to burn even if water is added to it.
You must add a significant amount of water to the alcohol before it dilutes enough to put out the fire.
STEM Teaching Resources
These teaching resources will make your STEM classroom more fun and rewarding for your students!

If you like this middle school STEM activity, you may also want to check out the ultimate list of winter STEM activities and the ultimate list of winter science experiments.
If you’d like more fun ice science experiments, try making hot ice, making frost, and making a magnifying glass from ice!
Can You Light Ice on Fire?
Follow along with these directions to make your own burning ice science experiment. Always make sure an adult is around to supervise this activity!
In this burning ice experiment, you’re not actually burning ice, but rather, you’re burning the alcohol surrounding the fire.
What’s actually happening is that the heat from the burning alcohol melts the ice and accellerates the evaporation of the water. But the ice itself isn’t burning.
Another way to “burn” ice is by adding calcium carbide to ice. This causes the calcium carbine to use the ice as fuel to burn the carbide. But that’s not really burning ice either- Geekologie says:
Calcium carbide consists of two carbon atoms stuck onto a calcium atom. Add that to liquid water (H2O) and the carbon atoms will grab hold of the two hydrogen atoms and produce C2H2, or acetylene gas.
Geekologie
In this case, it’s just another form of alcohol that the fire is burning.
STEM Shirts for Teachers
These STEM shirts are adorable and super fun to wear while teaching STEM or science.
What you’ll need for the burning ice experiment:
- An ice ball (we used this ice ball mold)
- Oven-safe glass bowl or dish
- Fire extinguisher
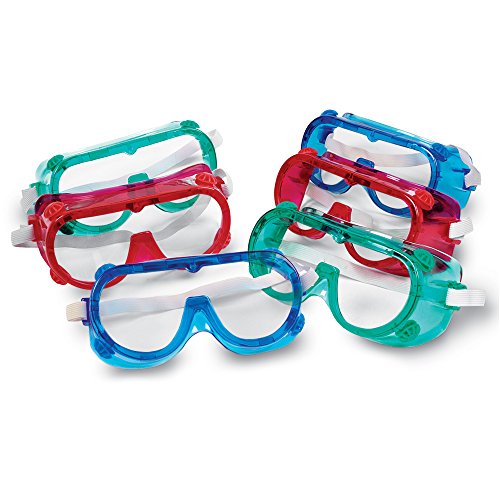
- Safety goggles
- Kitchen lighters
- Rubbing alcohol
Swan 99 Percent Isopropyl Alcohol Antiseptic Solution, 16 Ounce (Pack of 2)Bic Multipurpose Lighters, 4 Pack
Toplus Ice Cube Trays Silicone Set of 2 – Sphere Round Ice Ball Maker & Large Square Ice Cube Mold for Chilling Bourbon Whiskey, Cocktail, Beverages and More (Black)
Learning Resources Colored Safety Goggles
Pyrex Prepware 3-Piece Glass Mixing Bowl Set
Winter STEM Classroom Sets
If you don’t have time to gather the supplies yourself, you’ll love these winter science experiment kits for the classroom!
Most of these fun experiment boxes are designed for elementary school, but many of them touch on middle school science topics as well.


Doing the Fire and Ice Experiment

**Warning: This project is NOT safe for kids to do alone. Only a parent/adult should conduct the experiment with proper safety gear (goggles, a fire extinguisher) on hand just in case.
The fire can spread and catch unexpectedly. This is a science demonstration only, not something kids should touch.**
Wear safety goggles while doing this and make sure the kids stand well away from the area. Have your fire extinguisher ready.
Place your ice ball inside a fire-proof bowl.
Pour a TINY amount of alcohol onto the ice cube (less than 1/2 a teaspoon). The alcohol will automatically start to melt the ice cube.

Light the alcohol with the kitchen lighter.
You have to work quickly or the alcohol will get too watered down before the flame is lit and you’ll have to start over.
The ice will look like it is burning, even though it is just the alcohol on the top burning.
STEM by DesignSTEM Education Teacher Lesson Plans, Strategies and Activities Guide – for Grades 5 Though 9 – by School Datebooks
STEM to Story: Enthralling and Effective Lesson Plans for Grades 5-8
Arguing From Evidence in Middle School Science: 24 Activities for Productive Talk and Deeper Learning
Mark Twain – STEM Labs for Middle Grades, Grades 5 – 8
An Educator’s Guide to STEAM: Engaging Students Using Real-World Problems


